Wednesday, June 03, 2009 Wednesday, June 03, 2009

Atchara


Atchara, atsara, achara or however you spelled it. It is a Filipino side dish made from pickled papaya. It’s a perfect condiment to grilled meats and fishes. I have made this atsara over six months ago and opened the last jar two days ago. My in-laws have enjoyed the jar of atsara I sent to them and they can’t wait for more.


I did a little researched of atsara recipes and found so many versions but my favorite is the recipe below. It reminds me of my favorite manokan restaurant back in Cagayan De Oro City, Philippines. I love the sweet and sour taste of pickled vegetables. This relish is perfect additions to your condiments.


Atsara (Pickled Papaya)


Ingredients:

1 medium papaya, grated
½ red peppers, julienned
½ green pepper, julienned
2 inch piece ginger, julienned
1 medium carrot, grated
1 small onion, julienned
2 cups apple cider vinegar
2 cup white sugar
3 tablespoons salt

Preparation

1. Wash papaya, peel, scoop seeds out, and grate.
2. Squeeze the juice out of it. If you have cheesecloth the better but if not then use your strong hands.
3. In medium sauce pan, mix the vinegar, sugar, and salt.
4. Stir to dissolve the sugar and bring mixture to a boil.
5. Add grated papaya, lower the heat to low and simmer for about 5 minutes.
6. Add the rest of the ingredients. Turn off the heat, cover and allow to cool.
7. If you want to can your atsara for a long shelf life then you may, but I was too lazy to do it so I just bottled it up, sealed and refrigerated.

Wednesday, June 03, 2009

Grilled Chicken Breast

The kid’s was tired of eating chicken nuggets and sweet and sour chicken so I decided to grill the four chicken breasts that I had left in the fridge. I love grilled food and I could probably eat them anytime of the day. So if you’re craving for chicken tonight then grab the charcoal and start the fire. I have a gas grill and charcoal grill but I preferred the charcoal for so many reasons. It is up to you which one to use.

Prepare the chicken breasts an hour before grilling for spices to absorb for more flavors.


Grilled Chicken Breast


Ingredients:

4 chicken breast, skinned
Salt and pepper to taste
McCormick Seasoned Salt (sprinkle each chicken breast on each side)
4 scallions (optional)
Sweet Baby Rays Barbecue sauce

Preparation

1. Prepare the grill.
2. Wash, pat dry, and cut each chicken breast to flatten it a bit. (See photo above)
3. Sprinkle pepper and salt to taste.
4. Sprinkle McCormick Seasoned All in all sides. Set aside.
5. Grill chicken on a pre-heated grill for approximately 5 minutes on each side (or until the chicken is cooked and is no longer pink inside).
6. Brush each side of chicken with barbecue sauce and cook for another 2 minutes.
7. Grill scallion (optional). Enjoy!

I ate my grilled chicken with hot rice and atsara (pickled papaya). I will post the recipe of the pickled papaya on my next post.

Wednesday, June 03, 2009

Vegetable Slicer/Shredder


I got this vegetable slicer/shredder not long time ago. It’s a very handy gadget to have around but I wish I bought the mandoline instead. Oh well, I only paid $1.75 for it so no problem. This slicer is best for slicing carrots, cucumbers, radishes, celery and anything that is long and firm.

Monday, May 25, 2009 Monday, May 25, 2009

Shakoy


PhotobucketPhotobucketPhotobucket


Shakoy anyone? I have been craving for these street goodies for a long time now but just too lazy to make one. Shakoy or butsi or whatever names you call them is one of my favorite snacks back in the Philippines. It’s cheap and available anytime kahit hating gabi. I remember when I was little (little pa rin naman ako), iyong isang kapit bahay namin, araw-araw naglalako ng butsi o shakoy every afternoon. I just loved her shakoy because she put a lot of sweetened coconut filling inside. I think shakoy was like 50 cent (PHP) each that time. I love shakoy and I could probably eat them everyday.

I have researched and asked the recipe of this heaven goodness but unfortunately I can‘t find any decent one. Just make sure to consume your shakoy at once because it will get harder on the following day for some reasons.


SHAKOY or Butsi

Ingredients:

2 cups all purpose flour
1 Tbsp rapid rise yeast
½ tsp salt
Water enough to make soft dough
1 cup oil
½ cup white sugar


Preparation

1. In a bowl, mix flour, salt and yeast.
2. Add enough water and mix thoroughly to form soft dough.
3. Turn dough out onto a floured surface and knead. You need dough smooth and not sticky.
4. Place dough into bowl, cover with damp cloth. I place my dough in the oven with light on.
5. Let it rise for 1 hour or until the size is doubled.
6. Punch down dough, knead on a floured surface and form into a log.
7. Cut into pieces, 1-1/2 inches long.
8. Roll each piece into a long stick as thick as your finger.
9. Twist.
10. Place it on the baking sheet, cover with damp cloth, and let it rise for another hour.

After an Hour:

1. Heat oil in a deep pan. I used wok! If you have a fryer the better.
2. Drop shakoy one at a time.
3. Cook each side until brown.
4. Drain, and sprinkle with sugar.

Monday, May 25, 2009

Fruit Salad

Another poor quality photo, shame on you (pocket camera). I took out my rebel camera the other day and started using it again. I will try to take good photos and promised to bring my food to life.


FRUIT SALAD ( HALO-HALO)

Ingredients:

1 cup cantaloupe (I used melon baller to scoop it)
1 medium avocado, sliced into cubes
1 jar green coconut gel (optional)
½ cup preserved cherries, drained
1 can (20 oz) Del Monte fruit cocktail, drained
1 medium firm banana, sliced into cubes (used the juice of fruit cocktail to soak the banana to prevent browning- drain before adding it)
1 can (8 oz) nestle cream
½ cup condensed milk (you can add more to your desire sweetness)


Preparation

In a bowl, combine all the fruits, add nestle cream and condensed milk. Stir or fold gently and refrigerate until serving.

Tuesday, May 19, 2009 Tuesday, May 19, 2009

Black & White Brownie Cupcakes


I made these Black and White Brownie Cupcakes two weeks ago to satisfy my sweet tooth. The recipe was taken from Kusina Ni Manang. It’s my first time to make this kind of sweet and I was surprised that it turns out really good. The kid’s got all excited and cleaned the platter in a flash. Oh! I used the Ghirardelli Ultimate Fudge Brownie Mix instead of the Ghirardelli Dark Chocolate Brownie Mix that Manang used because I was not paying attention and picked the wrong box. I did not add any red wine too.


Black and White brownie Cupcakes

Ingredients:

1 box Ghirardelli Dark Chocolate BrownieMix1/4 cup water
1/2 cup vegetable oil
2 eggs
1 cup (8-oz) cream cheese, softened
1/4 cup sugar
1 tsp vanilla

Preparations:

Preheat oven to 350 deg F. In a medium bowl, stir together brownie mix, water, oil and 1 egg until moistened (about 40 strokes). Line muffin tin with paper cups and lightly spray with nonstick cooking spray. Spoon batter into muffin cups, filling 2/3 full. Using electric mixer, mix cream cheese, sugar, 1 egg and vanilla on medium speed for 1 minutes or until smooth. For each cupcake, place rounded tablespoon of cream cheese mixture on top of batter. Bake 28-32 minutes. Makes 16 cupcakes

Tuesday, May 19, 2009

Empanada


Please excuse the poor photo quality. I once again used my pocket camera in a low light. I really need to dig the boxes in the closet tomorrow and look for my canon rebel xti.


I was craving for the empanadas the other day and decided to make some. Empanada is also one of my favorite snacks. Every celebration (fiesta, birthday’s, Christmas and etc.) my mama and Lola always make this goodies to perfection. I like my empanadas without the raisins for some reasons. I am not crazy about the sweet taste very much.

Empanada

Filling:

1 cup small cube potato
1 cup small cube carrot
½ cup green peas
1 clove garlic, minced
½ onion, chopped
½ lb lean ground beef
½ cup water
Oil for frying
Salt and pepper to taste


Heat oil in a pan over medium heat. Sauté` onion, garlic until tender. Add ground meat until brown. Add potato, carrot and water. Cook until tender. Add green peas and cook for another minute or two. Season to taste. Set filling aside and cool completely before using.


Dough

I have tried several dough recipes to make empanadas but this dough by Latin Caribbean Food at About.com is one of the my favorites. It’s very easy and it taste just right.


* 3 cups flour (plus a little more for kneading)
* 1 teaspoon salt
* 1/2 cup cold water
* 1 egg
* 1 egg white
* 1 teaspoon vinegar
* 3 tablespoons shortening


1. In a bowl, beat the water, egg, egg white and vinegar together. Set aside.

2. In a separate bowl, mix together the 3 cups of flour and salt.

3. Cut the shortening into the flour mix with a pastry blender or two butter knives. Make a well in the center of the flour mix and pour the liquid ingredients from the first bowl into the center.

4. Mix the wet and dry ingredients with a fork until it becomes stiff.

5. Turn the dough out onto a lightly floured surface. Knead it just until all the flour is incorporated and the dough is smooth.

6. Wrap the dough in plastic and refrigerate for at least 1 hour, but never more than 24 hours.


Preparation:

1. Take your dough out from the fridge and place in a floured surface.
2. Roll the dough out into a 1/8 inch thick.
3. Cut the dough into circle with round cookie cutter or anything that you can think that you can use. (I used biscuit cutter, the biggest one).
4. Place filling in the center of the circle and carefully fold over the circle with filling to make a half circle.
5. Press the edges together to seal (you can either use your fingers or a fork).
6. Bake in preheated 375 degrees for about 15-20 minutes.

Enjoy!

Monday, May 18, 2009 Monday, May 18, 2009

Sesame Balls


Sesame balls are always one of my favorite desserts in Chinese buffet restaurant. It’s been a long time since I’ve eaten one so I decided to make my own. I made these sesame balls a week ago using my prepared mongo paste. I searched for the simplest recipes online and found this one. It’s very easy and quick to follow recipe.


Sesame Balls


Ingredients:

1 ½ cup sweet rice flour (I preferred Mochiko brand- you can buy it from any Asian stores)
¾ cup water (more or less)
12 inch rounded prepared mongo bean paste
½ cup sesame seeds
Peanut or vegetable oil for frying


Procedures :


1. Combine rice flour and water in a bowl, stir to form smooth dough. I used my hand to mix the two ingredients.

2. Knead the dough gently until smooth and easy to handle.

3. Divide the dough into 12 portions.

4. Flatten each piece of the dough. You can either use your fingers or small rolling pin dusted with rice flour.

5. Place each of the prepared filling in the middle and gather the edges of the skin to enclose. Pinch and seal. Roll gently into ball.

6. Coat with sesame seeds

7. Heat oil and deep fry until golden brown (3 minutes). Drain and Enjoy!


Yield: 12 Sesame Balls

Monday, May 18, 2009

Banana Cupcakes


I have three very ripe left-over bananas lying on top of kitchen counter the other day. I don’t want it to get wasted so I decided to make a banana cupcake. I always use the simplest recipe banana cake before but I found this new recipe Real Mom Kitchen. The cupcake is very easy to make and so delicious too. I did not make any icing because I was running out of cream cheese and confectioner sugar. I omitted the nutmeg too.


Banana Cupcakes


Ingredients:


2 cups all-purpose flour
1 cup sugar
1 teaspoon baking powder
1/2 teaspoon salt
1/2 teaspoon baking soda
1/4 teaspoon ground cinnamon
1 cup sour cream
1/4 cup butter or margarine, melted
2 large eggs
1 cup mashed very ripe bananas (I used 3 medium bananas)


In a large bowl, whisk together the flour, sugar, baking powder, salt, baking soda, and cinnamon. Using a mixer, beat the eggs, sour cream, butter and bananas; slowly add the dry ingredients and blend just until moistened. Fill greased or paper-lined muffin cups three-fourths full. Bake at 375 degrees for 20-22 minutes.

Yield: 12 cupcakes

Monday, May 18, 2009

Ubeng Halaya


I made this ubeng halaya last two weeks ago using the frozen ube in a bag that you can buy in any Asian stores. I made it mainly for toppings and stuffing.

Ube Halaya

Ingredients:
2 (14 oz. frozen ube, thawed)
Drops of purple food coloring (optional)
¼ cup butter
1 can (14 oz.) evaporated milk
1 can (12 oz.) condensed milk
1 to 2 cups white sugar (or desired taste)


All I did was mixed all the ingredients and cook to medium heat, stirring constantly until thicken and cook. I can’t really tell you exactly the time of cooking because I left the kitchen while it still cooking and forgot that I was cooking something “bad me”. I canned the ube halaya for long shelf life using a pint canning jar then boiled to boiling water for around an hour.

I will be using the ube for hopia, buchi and other goodies.


Yield: 3 jars (500 ml/jar)

Monday, May 18, 2009

I am back


Oh! It’s been awhile…I didn’t totally neglect this blog. I was just too busy doing some other things beside blogging. I am back to cooking and baking mood so expect more recipes and other cool things. I just bought my first bread machine so I will be baking bread very often now. I am still wishing for a new stand mixer though, I wish hubby will hear my begging ‘wink’. Anyway, I will be posting a lot of entries pretty soon so please come back and check me out again.

Thursday, September 04, 2008 Thursday, September 04, 2008

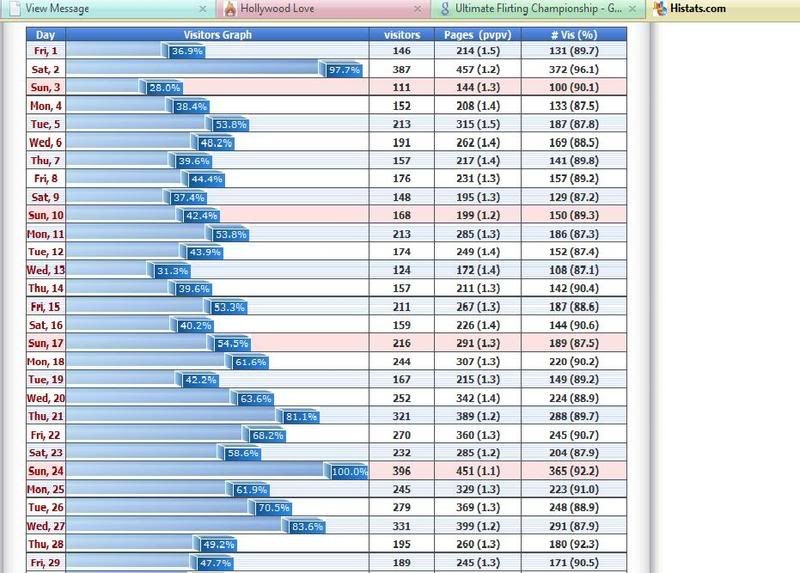
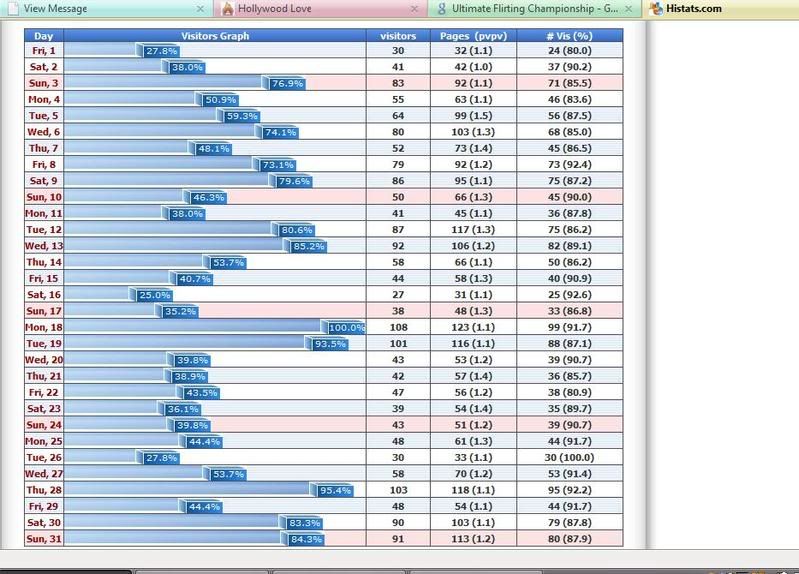
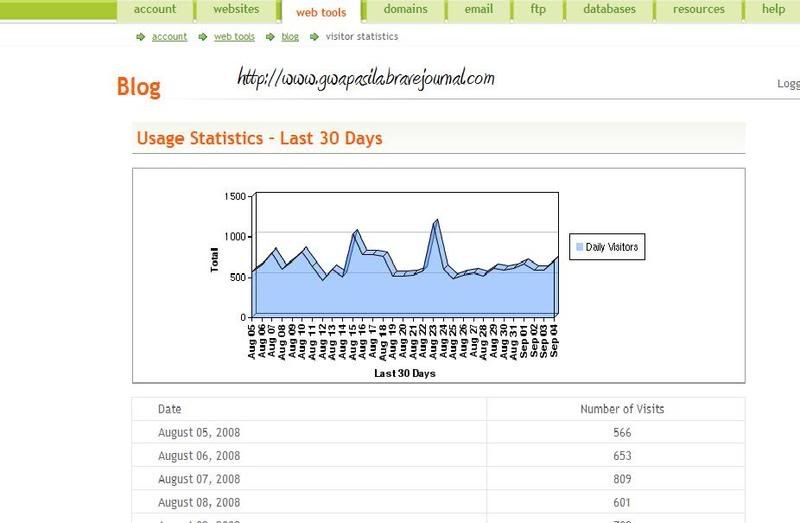
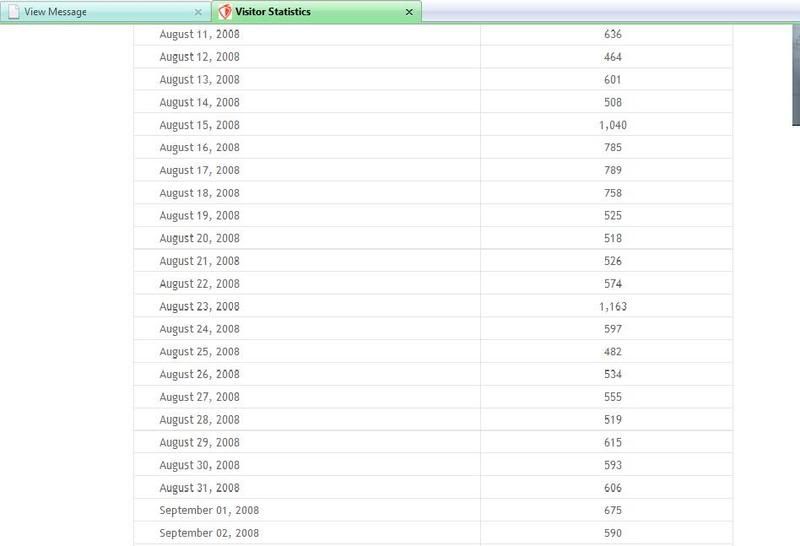
MY BLOGS STATS

( CLICK TO ENLARGE)


BLOG STAT ON AUGUST 2008 FOR http://www.gwapasila.com


BLOG STAT ON AUGUST 2008 FOR http://thefourseasonsofmylife.com


BLOG STAT ON AUGUST 2008 For http://gwapasila.bravejournal.com


Sunday, June 01, 2008 Sunday, June 01, 2008

Roses


One of my favorite color of roses in my garden. Simply gorgeous and a must to have in every rose garden.