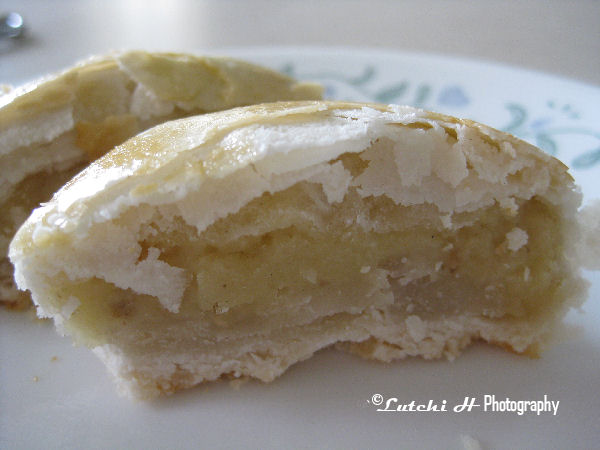
Not a very good pictures but it will guide you in preparing your first hopia baking.


HOPIA LOVE ME TOO
I made my first hopia three weeks ago. Hopia is always been one of my favorite snacks in the Philippines. It’s pretty hard to find a decent hopia around here. I watched people made them before and I found the preparation a daunty task. I did a little researched on how to make hopia and so far the recipe below is the easiest and fastest one. I adapted two recipes from Manang and starbulletin.
Also, I used lard instead of vegetable oil that most people do for so many reasons. I like how the lard works in my dough. Based on my experience, it makes the crust flakier and tastier. You can buy lard almost anywhere in the grocery stores or you can make your own if you have all the time. I love the onion filling of the hopia but unfortunately I didn’t find any recipe for it. I used mongo paste and ube halaya that I have prepared previously for my fillings. This hopia is delicious and a very easy to make, so if you’re ready to savor another childhood favorite’s then get ready and grab the lard, flour, and everything that you needed.
HOPIA
Ingredients:
1 egg beaten for brushing later
Dough 1:
1 cup all-purpose flour
½ cup lard
Use your hands. Mix together until crumbly. Set aside.
Dough 2:
2 cups all-purpose flour
1 tbsp. white sugar
½ cup lard
½ cup water
1. Mix flour, sugar, and lard together until crumbly.
2. Add water slowly and form soft dough (soft but not sticky).
3. With a rolling pin. Flatten the dough onto the floured surface (1/8 inch).
4. Get the Dough 1 and distribute on top of the flatten dough 2 evenly.
5. Gently roll the two dough’s together.
6. Wrap tightly with cellophane wrap.
7. Chill for at least 30 minutes.
After 30 minutes:
Pre-heat Oven to 375 degrees F.
8. Take the dough out and cut into pieces. 1- 1 ½ inches.
9. Make sure you’re filling’s are ready. I am not going to show you how to make filling’s yet. But you can use mungbean paste, red bean paste, ube halaya or anything that you can imagine.
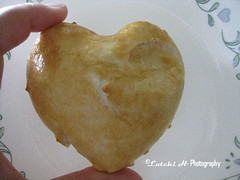
10. Roll each piece into circle or you can shape it in anyway you want (I used rolling pin).
11. Place a heaping tablespoon of filling in the center.
12. Gather edges of dough over filling and pinch together in the center.
13. Place pinched side down. Pat into a circle and flatten slightly.
14. Repeat procedure for all pieces.
15. Place hopia on an ungreased baking pan.
16. Bake for about 15 minutes or until the bottom are brown. (NOTE: the tops of hopia will still be pale or white).
17. Remove from oven. Brush each hopia with beaten egg.
18. Set oven to broil.
19. Bake hopia for about 1-2 minutes or until hopia tops are nicely brown. (NOTE: DO NOT WONDER AROUND WHEN BROLING YOUR HOPIA to prevent burning).
ENJOY!


5 Comments On "HOPIA"
Hi Lutchi, kumusta na? I came across from your blog gwapasila. nice lagi ni imong mga cooking, morag pang pro na. akong gi bookmark kay daghan ko ganahan.
Btw, nice photography of yours. keep it up.
Raquel
i love hopia! but i prefer hopiang baboy
wow, you made your own hopia. galing mo naman. yummy.
wow ur a good baker now sis.
love eng bee tin's ube hopia and the mongo hopia from Tipas bakery.. :)
i don't like hopiang baboy, tastes weird for me.
Post a Comment