Tuesday, June 30, 2009 Tuesday, June 30, 2009

Lumpia Shanghai


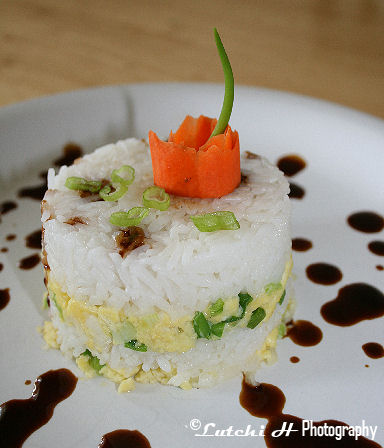
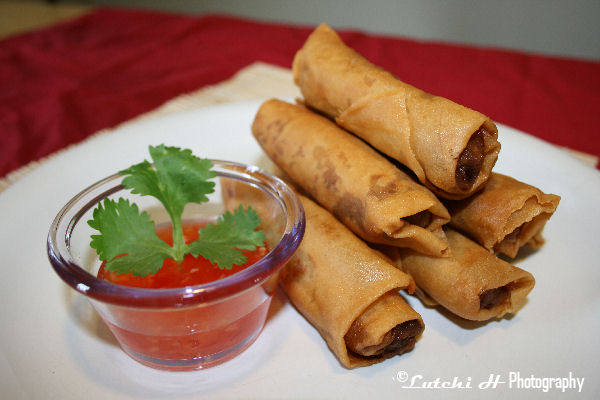
Lumpia Shanghai is one of my favorite finger goodies. I like to make the shanghai type all because it’s very easy to prepare. You will probably find all kind of recipes online but I have my own recipe, the one that is not too complicated to understand. A recipe that I grew up with…easy and simply yummy with plain soy sauce or sweet and sour sauce.


Lumpia Shanghai


Ingredients:

1 pound ground beef (lean meat the better)
1 medium onion, finely chopped
1 medium carrot, grated
1 stalk celery, finely chopped
2 cloves garlic, minced
1 egg beaten
2 Tbsp. Soy sauce
1 tsp. salt
½ tsp. ground pepper
1 package Spring roll wrappers (25 pcs.)
Oil for frying


Preparation:

1. In a large bowl, combine ground beef, onion, carrot, celery, garlic, egg, soy sauce, salt, and pepper thoroughly.
2. Lay out a lumpia wrapper one at a time in a flat surface, and place a tablespoon of the filling in a line down of the wrapper.
3. Take the bottom and top edges of the wrapper and fold then towards the center.
4. Take the left and right sides, and fold them towards the center.
5. Moisten the last edges of the wrapper with water to seal.
6. Repeat procedure using the rest of the wrappers.
7. In a deep pan or fryer, heat oil to 375 degrees F.
8. Fry lumpia’s (5 to 6 pieces at a time).
9. Fry until golden brown (3-4 minutes), turning once.
10. Drain and Enjoy with your favorite sauce.


PhotobucketPhotobucketPhotobucket


Tuesday, June 30, 2009

Rice o'lette with Hoisin and Soysauce

You can bring your left-over food into something new and delicious. I always like to play with my food to make it more interesting and eye catching for the kids. I made this Rice o’lette the other morning and it was a hit for the kids.


Rice o'lette with Hoisin and Soy sauce


Ingredients:

1 cup cooked rice
½ cup scrambled eggs with scallions
1 Tbsp. Hoisin sauce
1 Tbsp. Soy sauce


Preparation:

1. In a cup, put half of the scrambled eggs.
2. Add half of the rice.
3. Repeat the procedure using the rest of the ingredients.
4. Mix hoisin sauce and soy sauce together and drizzle into the Rice o’lette.


Enjoy!

Wednesday, June 24, 2009 Wednesday, June 24, 2009

Chocolate Cupcakes with Buttercream Frosting


The kid’s enjoyed these easy to prepare and delicious chocolate cupcakes. I used the left-over butter cream for frosting that I have made during Zack’s birthday two weeks ago. Hey! If you have the money to spare then grab the finest cocoa powder you can find. One of the secrets of the melt in your mouth chocolate cupcakes is a good quality coco powder (that based on my experience). I have tried the cheapest or store brand coco powders and they can’t compare and I guess you all know the reasons why.

There are so many cocoa powders available out there and your choices are endless. But here is my short list of the Cocoa Powders that I like best:
Valrhona Cocoa powder, Hershey’s Cocoa powder, Hershey’s Special Dark Cocoa, Ghirardelli unsweetened Cocoa.


Chocolate Cupcakes with Buttercream Frosting

Ingredients:

1 stick butter, room temperature
1 ¼ cup sugar
2 eggs, room temperature
¾ cup All-purpose flour
1 tsp. baking powder
¼ tsp. salt
½ cup unsweetened cocoa powder
½ cup milk
1 tsp. vanilla
12 muffin cups sprayed with cooking oil

Preparation:

1. Pre-heat oven to 350 degrees F. Line cupcake pans with paper liners. Set aside.
2. In a medium bowl, beat the butter until soft.
3. Add sugar, beat about 3 minutes.
4. Add the eggs, one at a time beating until they are well combined.
5. In another bowl, place all dry ingredients. Stir until combined.
6. Add ½ of the dry ingredients to the butter, sugar, eggs mixtures. Beat it just to combine.
7. Add milk and vanilla. Beat
8. Add the rest of dry ingredients. Beat until combined.
9. Divide batter evenly among liners, filling about 2/3’s full.
10. Bake for about 20 minutes or when toothpick inserted comes out clean.
11. Transfer to a wire rack to cool completely.
12. And frost the top of each cupcake with your favorite frosting. You can add sprinkles or nuts or fruits, if desired.

Enjoy!

Wednesday, June 24, 2009

Sweet and Sour Pork


We had a blast during Father’s Day. The kid’s prepared something cute for their daddy. I was not really in the mood of cooking but I can’t resist on making something nice for him. We all likes Chinese food so I decided to make sweet and sour pork with Japanese fried rice and chocolate cupcakes with butter cream frosting.


I found this sweet and sour pork recipe online long time ago. I can’t even remember where I got it. I like it better compare to other recipes all because it’s not thick and gluey. I tweaked the ingredients a bit to suit my taste. I like it when the sweetness and sourness is balance. I guess that the secret of this recipe.


Sweet and Sour Pork

Ingredients:

1 lb boneless pork loin cut in 1-inch cubes
2 Tbsp. Flour
1 tsp. garlic, mince
4 scallions, thinly sliced (diagonally)
½ cup red bell pepper, cut into ¾ inch-cubes
½ cup green bell pepper, cut into ¾ inch-cubes
1 large sweet onion, cubes
½ cup pineapple, chunks
Oil for frying


For Batter:

½ cup all-purpose flour
½ cup cornstarch
1 Tbsp. baking powder
¼ tsp. salt
¾ cup cold water
1 tsp. cooking oil

Combine dry ingredients in a medium bowl. Whish in cold water until combine. Add the oil and stir until smooth. Set aside.

For Sauce:

½ cup white vinegar
¾ cup white sugar
½ tsp, salt
6 Tbsp. tomato sauce
1 Tbsp. soy sauce
1 Tbsp. cornstarch

Combine all ingredients in a small bowl. TASTE TEST to suit your taste. You can always add more sugar if it’s too sour and add more vinegar if it’s too sweet. Try to balance the sourness and sweetness to get that “bang”. Set aside.


1. Heat oil in a pan or fryer to about 350 degrees F.
2. While your oil is heating. Dust pork loin cubes with the all purpose flour.
3. Dip the floured coated pork pieces into the batter and fry in the hot oil for about 8 minutes or until golden on brown both sides. (TRY to fry in small batches - do not over crowd the fryer)
4. Remove pork pieces and transfer to a plate with paper towels.
5. Cover it with aluminum foil and place it in the oven to keep it warm. Repeat until everything has been fried.
6. In a wok (if you have any), heat a tablespoon oil, add minced garlic and scallion.
7. Stir-fry for about 30 seconds.
8. Add onions, red and green bell pepper. Stir-fry for another minute.
9. Add the sauce and bring to boil. Stir until thickened.
10. Remove from heat.
11. Transfer pork to serving platter and pour the sauce over the pork.
12. Add pineapple chunks on top. Serve hot with rice.

Enjoy!


Sunday, June 21, 2009 Sunday, June 21, 2009

Pizza Boys


Pizza is a long time favorite of my boy's. I am not too crazy about this food so I don't make them very often. I usually buy pizza in a box at the grocery stores or take-out. Hubby was craving for homemade pizza today so I decided to make one. I used this wonderful and easy to follow bread machine pizza dough but I tweaked the recipe a little.

I have left over barbecue chicken from yesterday and three slices of bacons this morning. I used them for my toppings.You can put almost anything for your toppings so if you have any left-over’s meats in the fridge then go ahead use them. Believe me! this pizza is delicious and it's one of the best pizzas you will ever have.

PhotobucketPhotobucketPhotobucket
PhotobucketPhotobucket


PIZZA


Dough

Ingredients:

1 packet dry active yeast ((PROOF YEAST- in a bowl, add 1 teaspoon sugar to ¼ cup warm water (100° to 110°F).
Sprinkle yeast; let stand for 10 minutes until it foams).
3 cups bread flour
1 teaspoon salt
2 tablespoons sugar
2 tablespoons olive oil
1 cup water, plus
2 tablespoons water


Preparation:

1. In a Bread Machine pan. Always place all the wet ingredients first, followed by dry ingredients and then yeast.
2. Place the BM pan back to the BM maker, then select the dough cycle in the menu and press start!
3. When the dough cycle is complete (it took me at least 1 hour and 30 minutes), take the dough out of the machine and place in well greased bowl,
and roll the dough around (in the bowl) thus’ coating' it in oil.
4. Cover and leave to rise in a warm place (inside the oven with light on) for about 30 minutes.
5. Knead the risen dough gently.

To shape and bake:

6. Preheat oven 450 degrees F.
7. Place the dough on well greased baking tray or pizza pan (I used my 12 inches round stone pizza pan-).
8. Roll the dough into a circle.
9. Bake the prepared pizza dough for about 10 minutes.


While your pizza dough is baking prepare your toppings. I used Del Monte Traditional spaghetti sauce. I like
the taste of it better than the regular pizza sauce. The kid's don't like vegetables and pineapples so I left half of
the pizza with none of it.


Topping Ingredients:

1 cup spaghetti sauce
2 cups Mozzarella cheese, shredded
1 barbecue chicken breast, cut into cubes
3 fried bacon, crumbled
1/2 cup sandwich ham, cut into cubes
1/4 cup green pepper, thinly sliced
1/4 cup onion, thinly sliced (I used Vidalia)
1/8 cup tomato, chopped
1/4 cup pineapple chunk


Preparation:


1. After baking pizza dough for 10 minutes.
2. Place all the above ingredients in order I have listed.
3. Turn the oven temperature to 400 degrees F.
4. Bake Pizza for another 10 to 15 minutes or until all side is golden brown.

ENJOY!


Friday, June 19, 2009 Friday, June 19, 2009

Strawberry Thumbprint Almond Cookies


I always grab a handful of almond cookies every time we eat out in a Chinese buffet. I always thought their cookies are so delicious. I like the sweetness and texture of it. My first attempt of baking these goodies was not very successful for some reasons. I have tried to make my second batch with a twist and it turns out really wonderful. Instead of almond cookies, I turned it into thumbprint almond cookies with grape and strawberry jellies. You can put anything that you like though.

click to enlarge

PhotobucketPhotobucketPhotobucketPhotobucketPhotobucketPhotobucket
PhotobucketPhotobucket


Strawberry Thumbprint Almond Cookies

Ingredients:

1 cup vegetable shortening
1 1/4 cups sugar
1 large egg
1/2 teaspoon vanilla extract
1 teaspoon almond extract
1 3/4 cups all-purpose flour
1 teaspoon baking powder
1/4 teaspoon baking soda
¼ cup strawberry jelly or grapes

Preparation:


1. Pre-heat oven 350 degrees F.
2. With an electric beater, cream together the shortening and sugar until fluffy.
3. Beat egg in a small bowl, reserve one tablespoon for brushing.
4. Add beaten egg, vanilla and almond extract to the sugar mixture until combined. Set aside
5. SIFT together the flour, baking powder, and baking soda onto a wax paper.
6. Add to the cream mixture. Stir until just blended. (Dough will be a bit crumbly but should hold together)
7. Form the dough into balls (1 inch in diameter).
8. Using your thumb or index finger, make deep indentation in center of each ball (be careful not to press too hard).
9. Spoon a jelly or jam into each cookie ball (do not overfill).
10. Place them 2 inches apart on ungreased cookie sheets.
11. Get the 1 Tbsp. beaten egg that you reserved and with pastry brush, brush the top edges lightly.
11. Bake cookies about 10 -12 minutes or until slightly brown on the edges.


NOTE: You can add the jelly or jam before or after cooking. I add more jelly after cooking because it was not looking right.


ENJOY

Thursday, June 18, 2009 Thursday, June 18, 2009

Garlic Breadsticks


I made some garlic bread sticks to go with my pizza for lunch today. I didn't have any marinara sauce with it but it was still very good.I don't have any special recipe for garlic bread sticks so if you like it garlicky, crispy in the outside and soft in the inside then this recipe is for you. I am pretty sure your family will like it.


(click to enlarge)

PhotobucketPhotobucketPhotobucket
PhotobucketPhotobucket


Garlic Breadsticks

Ingredients:

1 Tbsp rapid-rise yeast
1 cup water
1 tsp sugar
1 tsp salt
1 Tbsp vegetable oil
1 cup whole wheat flour
1 1/2 cup all-purpose flour
Garlic powder
1/3 cup melted butter


Preparation:

1. In a bowl, combine salt, oil, sugar, whole wheat flour, all purpose flour, and yeast.
2. Slowly add water to the mixture to form dough.
3. Knead into soft dough. Let rest for 10 minutes.
4. Spray your hands with a little bit of oil to avoid the dough from sticking.
5. Lay the dough in the floured surface.
6. Knead gently and stretch to make a log.
7. Using a dough cutter, cut log into pieces (1 inch to 1-1/2 inches).
8. Roll each piece into breadsticks.
9. Place prepared breadsticks onto greased baking pan.
10. Brush each piece with melted butter.
11. Sprinkle with garlic powder on top.
12. Place the pan back to the oven with light on. Let it rise for another 15 minutes or
until the size is double.
13. Take the pan of breadsticks out from the oven.
14. Pre-heat oven at 450 degrees F (if you're using a very thin baking pan then you might need to adjust the temperature down
to avoid burning).
15. Bake for 12 minutes.
16. Brush on more butter. Best when serve warm.

Saturday, June 13, 2009 Saturday, June 13, 2009

Cinnamon Rolls

I made these cinnamon rolls not long time ago using the ensaymada dough. It was pretty good that the platter got sparkling clean after a day. I was too lazy to prepare the sugar frosting so we eat it as it is. It was super soft and delicious. I will try to make some cinnabon next time. I can’t find the recipe for this cinnamon rolls, it probably buried somewhere in my files. I will post it as soon I find it.

Saturday, June 13, 2009

Coleslaw


We had pork barbecue dinner southern style the other night and I made this coleslaw to go with it. If you love creamy, tart and sweet -style coleslaw then you have to make this one sometimes. My mom-in law had taught me how to make real southern style coleslaw.

If you have food processor then you can use it to chop your vegetables. I have one but decided not to use it because I am only making for two persons. I did not add any green pepper too for some reason.


SOUTHERN STYLE COLESLAW


Ingredients:


Vegetables
1 large, cabbage, chopped fine
1 medium, carrot (you can slice it whatever you want)
1 medium, Vidalia onion, chopped ( any sweet onions)
1 medium green bell pepper, chopped


Dressing:
1/4 cup mayonnaise (or to taste)
½ cup vinegar
½ cup honey or sugar
1 tablespoon olive oil
Salt and pepper to taste


Preparation:

1. Mix chopped cabbage, carrot, bell pepper and onion in a large bowl. Set aside.
2. In another bowl, stir together all dressing ingredients until combined.
3. Taste your dressing to your likeness. You can always add honey/sugar if it’s too sour, or add vinegar if it’s too sweet.
4. Pour the dressing into the vegetable mixture and toss gently.

Enjoy!

Wednesday, June 10, 2009 Wednesday, June 10, 2009

HOPIA


( CLICK TO ENLARGE)
Not a very good pictures but it will guide you in preparing your first hopia baking.

PhotobucketPhotobucketPhotobucket
PhotobucketPhotobucket


HOPIA LOVE ME TOO

I made my first hopia three weeks ago. Hopia is always been one of my favorite snacks in the Philippines. It’s pretty hard to find a decent hopia around here. I watched people made them before and I found the preparation a daunty task. I did a little researched on how to make hopia and so far the recipe below is the easiest and fastest one. I adapted two recipes from Manang and starbulletin.


Also, I used lard instead of vegetable oil that most people do for so many reasons. I like how the lard works in my dough. Based on my experience, it makes the crust flakier and tastier. You can buy lard almost anywhere in the grocery stores or you can make your own if you have all the time. I love the onion filling of the hopia but unfortunately I didn’t find any recipe for it. I used mongo paste and ube halaya that I have prepared previously for my fillings. This hopia is delicious and a very easy to make, so if you’re ready to savor another childhood favorite’s then get ready and grab the lard, flour, and everything that you needed.


HOPIA

Ingredients:

1 egg beaten for brushing later


Dough 1:

1 cup all-purpose flour
½ cup lard

Use your hands. Mix together until crumbly. Set aside.


Dough 2:

2 cups all-purpose flour
1 tbsp. white sugar
½ cup lard
½ cup water

1. Mix flour, sugar, and lard together until crumbly.
2. Add water slowly and form soft dough (soft but not sticky).
3. With a rolling pin. Flatten the dough onto the floured surface (1/8 inch).
4. Get the Dough 1 and distribute on top of the flatten dough 2 evenly.
5. Gently roll the two dough’s together.
6. Wrap tightly with cellophane wrap.
7. Chill for at least 30 minutes.

After 30 minutes:
Pre-heat Oven to 375 degrees F.

8. Take the dough out and cut into pieces. 1- 1 ½ inches.
9. Make sure you’re filling’s are ready. I am not going to show you how to make filling’s yet. But you can use mungbean paste, red bean paste, ube halaya or anything that you can imagine.
10. Roll each piece into circle or you can shape it in anyway you want (I used rolling pin).
11. Place a heaping tablespoon of filling in the center.
12. Gather edges of dough over filling and pinch together in the center.
13. Place pinched side down. Pat into a circle and flatten slightly.
14. Repeat procedure for all pieces.
15. Place hopia on an ungreased baking pan.
16. Bake for about 15 minutes or until the bottom are brown. (NOTE: the tops of hopia will still be pale or white).
17. Remove from oven. Brush each hopia with beaten egg.
18. Set oven to broil.
19. Bake hopia for about 1-2 minutes or until hopia tops are nicely brown. (NOTE: DO NOT WONDER AROUND WHEN BROLING YOUR HOPIA to prevent burning).


ENJOY!

Sunday, June 07, 2009 Sunday, June 07, 2009

Wheat Oatmeal Cookies

The kid’s and hubby were craving for some oatmeal cookies the other day. I was not really in the mood of baking but they were pretty annoying so I gave in ‘wink’. The oatmeal recipe that I used was taken from here. I made some changes to my liking for some reasons (out of all purpose flour and raisins).

If you like your oatmeal cookies to be crunchy and crispy then this is not for you. My oatmeal is kind a chewy and soft just the way I like it. So if you’re ready for some baking then here is the recipe.


Wheat Oatmeal Cookies

Ingredients:

1 3/4 c. whole wheat flour
1/2 t. baking powder
1/4 t. baking soda
3 c. old fashioned oatmeal
2 large eggs
3/4 t. salt
1 t. vanilla extract
14 T (1 3/4 sticks) unsalted butter, melted
2 T vegetable oil
1 c. granulated sugar
1 c. packed light brown sugar
1 1/2 t. cinnamon


Preparation

1. Heat oven to 350 degrees. Prepare greased pan.
2. Mix flour, baking powder, baking soda, cinnamon, and oatmeal in a medium bowl.
3. Beat eggs, salt and vanilla in a small bowl.
4. Mix butter, oil, and sugars in a large bowl.
5. Stir in egg mixture until smooth.
6. Stir in flour mixture.
7. Drop by rounded tablespoonfuls onto the cookie sheets. Bake until golden brown, 12 - 15 minutes, and then transfer to a wire racks (for cooling).

Sunday, June 07, 2009

WHEAT PANDESAL


CLICK TO ENLARGE

PhotobucketPhotobucketPhotobucket


PhotobucketPhotobucket


Pan de sal? I surfed the net of its meaning and this what wikipedia said: Pandesal (Spanish: pan de sal, literally "salt bread") is a rounded bread usually eaten by Filipinos during breakfast.[1]. It is bread made of flour, eggs, lard, yeast, sugar, and salt. It has a soft, powdery texture and is eaten in a number of ways combined with numerous sandwich spreads. It is also used for dipping into tsokolate (chocolate), a chocolate drink very much like hot chocolate but with pure cocoa as its main ingredient. Despite the literal meaning of its name, the taste of pandesal varies from bland to slightly sweet. It usually costs one Peso (about 4 cents U.S.), with larger varieties costing 2 Pesos.

The last time I had Pandesal was three years ago when I visited the Philippines. This bread is always one of my favorite breads. It is the most popular bread in the Philippines. I grew up in a place that surrounded by bakeries so I never learn how to make it. Pandesal that just came out from the oven is always the best. I like it with butter, margarine, corn beef or just plain.

Oh! I made my very first pan de sal using bread machine for the dough. I just love my BM to the mixing, kneading and rising. It’s a lot faster, less messy and convenient for me. I have all kind of pandesal recipes but because I don’t have most of the needed ingredients, I did the tweaking once again and came out with this recipe.


WHEAT PANDESAL


Ingredients:

2/3 cup milk
2 large eggs
2 Tbsp butter, cubed
1 tsp salt
1 cup bread flour
2 cups wheat flour
1 Tbsp sugar
Italian bread crumbs - for coating
1 packet active dry yeast
PROOF YEAST- in a bowl, add 1 teaspoon sugar to ¼ cup warm water (100° to 110°F). Sprinkle yeast; let stand for 10 minutes until it foams.

Preparation

1. Add ingredients to bread machine pan following the manufacturer suggestion.
2. Set the bread machine to dough cycle and press start.
3. Wait for the dough cycle to complete. It took me at least 1 hour to 30 minutes.
4. When the dough is ready. Unplug your BM and take the pan out.
5. Grease your hand with cooking oil.
6. Punch the dough down until it deflates.
7. Lay the dough on the prepared greased surface and stretch to make a log.
8. Squeeze the dough gently to release some trapped air.
9. Cut the log into two and sprinkle it with bread crumbs. I used Italian bread crumbs.
10. Using a dough cutter, cut logs into pieces (1 to 1-½ inches).
11. Roll each piece to bread crumbs to coat all sides.
12. Place pieces on greased (I used olive cooking spray) baking pan, with the cut side up 1 inch apart.
13. Cover with clean damp cloth and put it inside the oven with the light on. Let it rise for about 30 minutes.
14. Take it out.
15. Preheat the oven to 350 degrees F.
16. Bake for 12 minutes or until golden brown.
17. Let Cool and enjoy with your favorite fillings.

I made 18 pieces of Pandesal. It was crunchy in the outside and soft in the inside. .At first, I never thought its going to work out because I was not using BM yeast and all bread flour but hey! It turns out really good, more than I expected. The recipe was very easy and fast. Just follow the steps and you will have a delicious and healthy pandesal in no time.